Part 14-Making the Bones
As the previous page suggested, there was a 500 lb gorilla here, perhaps it has
to do with quantum entanglement or some such for there is no earthly reason why any of this should cost so much or
be so difficult. It could have been done with a box of nails and a few 2x4s. The aluminum equivalent should be only marginally more complicated and expensive, both temporally and monetarily. Below is a picture taken from my
notebook for the general bones, or superstructure of the greenhouse. It looks simple, the aluminum only costs
a few hundred dollars. We're good to go right? I order the aluminum from ALRO metals of New Haven, formerly "Art Iron". How do you join it together? You want to use aluminum or stainless
fasteners and so there is a cost. Each corner could be held with one or two plates and 8 to 12 screws/plate. Self tapping stainless
screws are roughly
13$/box, self drilling are up to 4 times more expensive, roughly one box per window, 13 windows, thirteen boxes, 169$
just for the plate screws. Total number of holes to be drilled, 1300, roughly 620 twice, once in the 52 corner plates,
once in the support structure. In addition, each sill requires about one screw per 2/3 foot to attach the backstop or H channel for
the glazing, minimum 42 per sheet of glazing, 25 sheets of glazing are sitting on my shop floor, another 10 boxes of screws, $130, and another
mind numbing hole drilling exercise, using a custom template so that the spacing is right. And we haven't talked
about the roof. So I think to myself, the frame should be welded (no 1300 holes drilled and tapped, no 56 custom
corner plates made out of aluminum. So I made one for visualization and cut myself numerous times but with no time off the clock). I call around to various farm and car body shops and find a young man who owns a car customizing company.. His quote for the first window frame=$55. I say go, 6 frames
at $330 sounds good. Actual final cost, time plus materials, $790.... oops. I could have almost bought the welder on
ebay for that price and still had money for a welding course and a bottle of argon, rats. Argon rats is a type of malt liquor sold in Peoria in the summer time when there is a partial lunar eclipse. Around here, whiskey will do.
Hidden in here is the decision not to use H and J channel to surround the panes on the lower structure but to use a simple backstop instead. H channel looks OK but does not facilitate upgrade to acrylic or glass and requires additional framing and reinforcement. In addition the cost is considerable, $10 to $14 per 8 foot length, similar to the general purpose solution. Assuming each sheet requires at least 3, this is $800 total before shipping and not counting the cost of the frames, the glazing, the screws, etc. all mentioned above. But I wanted to use H channel for the roof to lessen leakage. And I found an extruder who, with shipping would do it for $750, still... I didn't have another $750. So I decided to go with the 3" aluminum strip I had laying on the ground for the lower portion. This advanced the line of position on the project but is expected to create a shortfall toward the end that has to be made up by ordering more aluminum. And, a capture strip or edge has to be used to cap each piece of glazing, ideally a small piece of angle aluminum so that future upgrade/age replacement would be no problem. Metal Supermarkets, a small retail company, closer than ALRO in New Haven, had some 1/8" x 3/4 " strip. This seemed OK so I found an old boat anchor for a counterweight for the panel saw and fired it up to cut the first panes of glazing!! It was a wee bit froohked, as the kids used to say, I need to align the panel saw a bit, but it is probably acceptable. Temperatures here are hovering at 8 to 10 degrees, so actual assembly is delayed.
So here was the compromise, the risers, distance from sill to top were to be 36". I cut this down to 32" and swung the glazing support to the inside of the frame, leaving the overall frame height at 36" but the light admission height at just over 30". This meant I could do one wall plus one roof piece out of one piece of glazing, or so I thought based on earlier calcs. Remember that old adage, measure twice, cut once. It also goes for calculating roof rafters and perlins from your pitch data. Theoretically, the one inch square aluminum now became structural reinforcement for the frame and didn't need to be welded or attached to the frame with a special plate. The bad news, less light and no room for error. As I soon realized, 32 inches only leaves 6'4" not the 6'8" I thought would be left over but there was good news, 3 of the 32" panes exactly comes out of a 96" sheet with the saw kerf for window fit allowance. Actual fit, as pointed out by the welder, would be not quite as planned. I failed to take into account the saw kerf when I cut the frames prior to welding. Now, multiple errors compounded, all seemed once again in order.
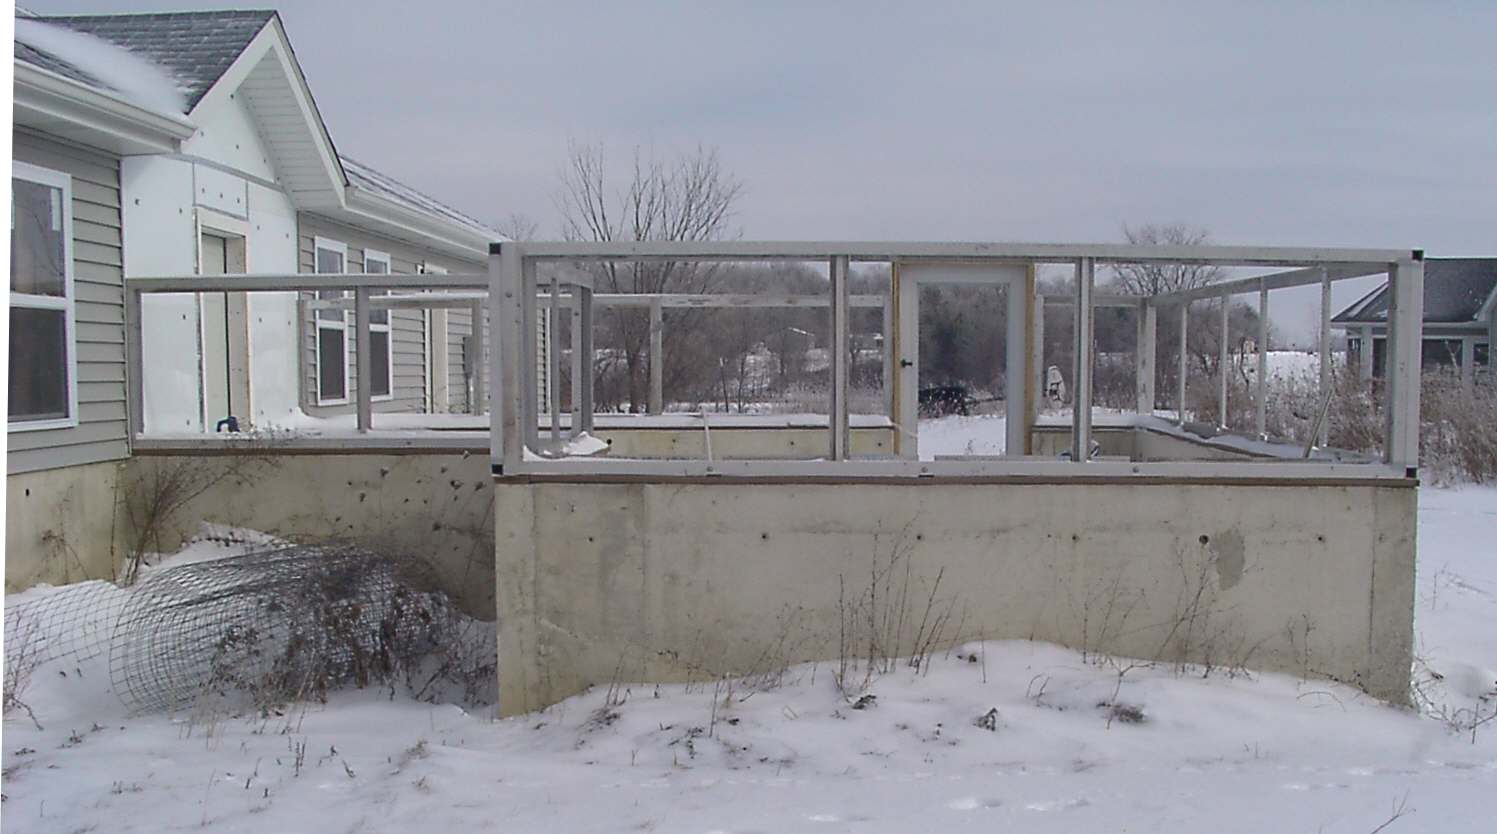
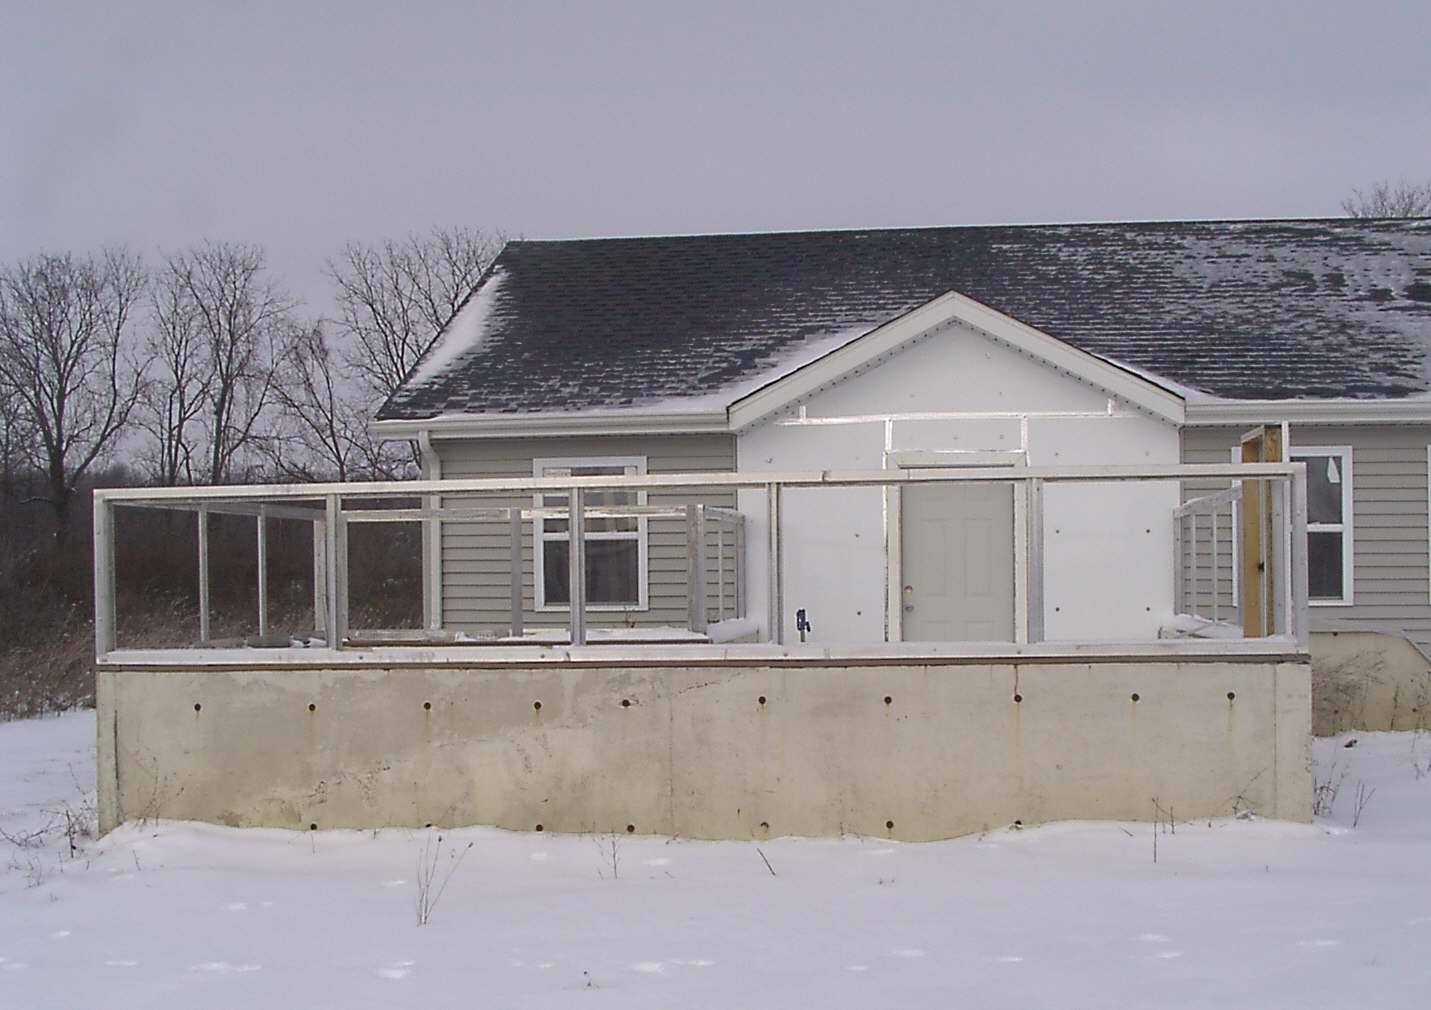
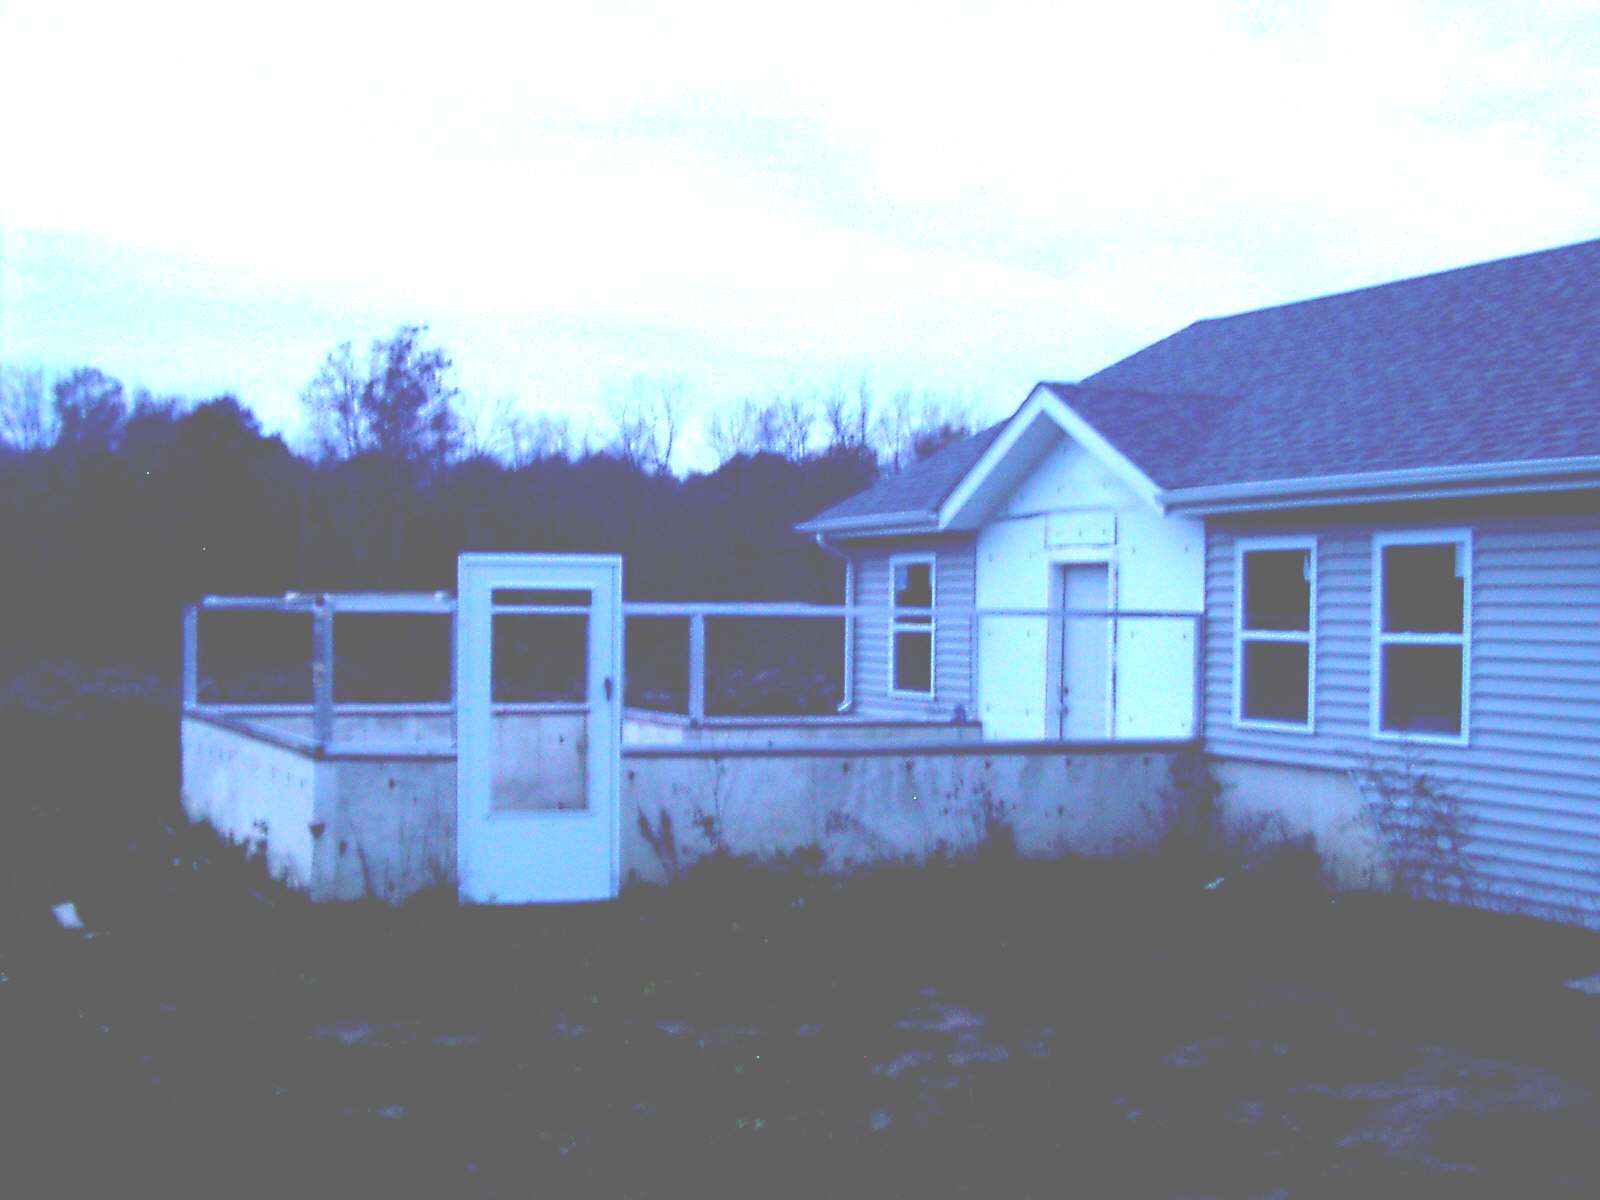
To view the overall frame, I literally taped the structure together as shown in the picture taken as dusk above (both duck and duct tape are proper terms, see Wikipedia). There were 4 or 5 problems, the cement wasn't leveled properly next to the door. In one small section of the frame this created a 3/4"gap that had to be filled. The Trex sills were also not same in one section, a 1/2" height difference (free isn't always so free, the 80' of Trex was another unforseen expense). On one inside corner frame I measured one section wrong and added 2" instead of subtracting. I caught the error before going to the welder but decided the longer frame section would make it easier to work on the inside corner, probably sloppy thinking but since it modeled out before hand there was no major problem. When I bolted it together, it definitely took on a steampunct appearance. But the welds for the frames were beautiful. The critical wall lengths were a carpenters fit, and all seemed right once again with the universe. Taping the structure to find the errors was a mixed bag, now physically dropping a frame could cost me $200 or more. But fortune held... It all fit, errors self compensated, the added 2" on the backside frame was perfect to compensate for run out, and the tape that I had used to carry the aluminum to the welder now tacked everything together long enough to tape the rest and not lose a frame. It all was clean as a whistle.
God gives little clues, or as the movie says, "There are signs everywhere". I went to the hardware store to look at and buy sill anchors. A 6" wimpy looking concrete screw cost anywhere from $0.80 to $2.00. Most other anchors were over $2. But I thought my wallet was on the seat of the car, so when I arrived at the hardware & it wasn't there & I was almost penniless. I took this as a sign and I bought 1 anchor screw with a stainless washer instead of the 80 or so I thought I would need. Amazingly, when I erected the sills with tape I discovered a peculiar thing, all the existing 1/2" screws holding the Trex were sufficiently close to being in a line and had sufficient extra thread to handle a piece of angle aluminum. I could then use up to a 1/2" stainless bolt to hold the frames permanently in place. This reduced both the cost and the number of parts while holding the machine time down, improving corrosion resistance, and reducing buckling due to vertical loading. I would need to go to Fort Wayne for 50 inches of angle aluminum but I might be able to hit a bulk supplier for the bolts and cut my overall cost, hmm. And so I did, it was on this trip too that I discovered the 3/4" strips suitable for holding the glazing. By mid October the frames were in and secured, shortly after that all the vertical members were installed, & shortly after that type II diabetes, and it's asspciated financial costs ate the whole project like some huge life sucking sea eel. But I digress. Overall, the financial success or failure remains about the same despite numerous massive setbacks. And now, when Marge gives me a bad time I can simply say I need to measure my blood sugar or shoot up with special sauce (i.e. insulin).
The welded lower frames were duct or duck taped together so that all the bugs could be seen and fixed:
|